Do You Have Questions?
Our Customer Service team is here to help you during each step of the certification process.
Corporate Information
In the SQF Assessment Database, after you have finished the User Registration it is timed to enter your Corporate Information. Follow these steps:
1. After you have clicked the “CONFIRM" button on the User Registration you will be directed to the “Corporate Information” page.
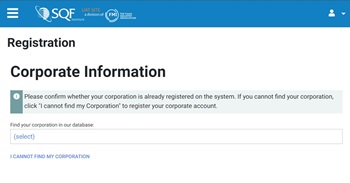
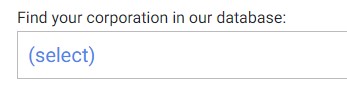
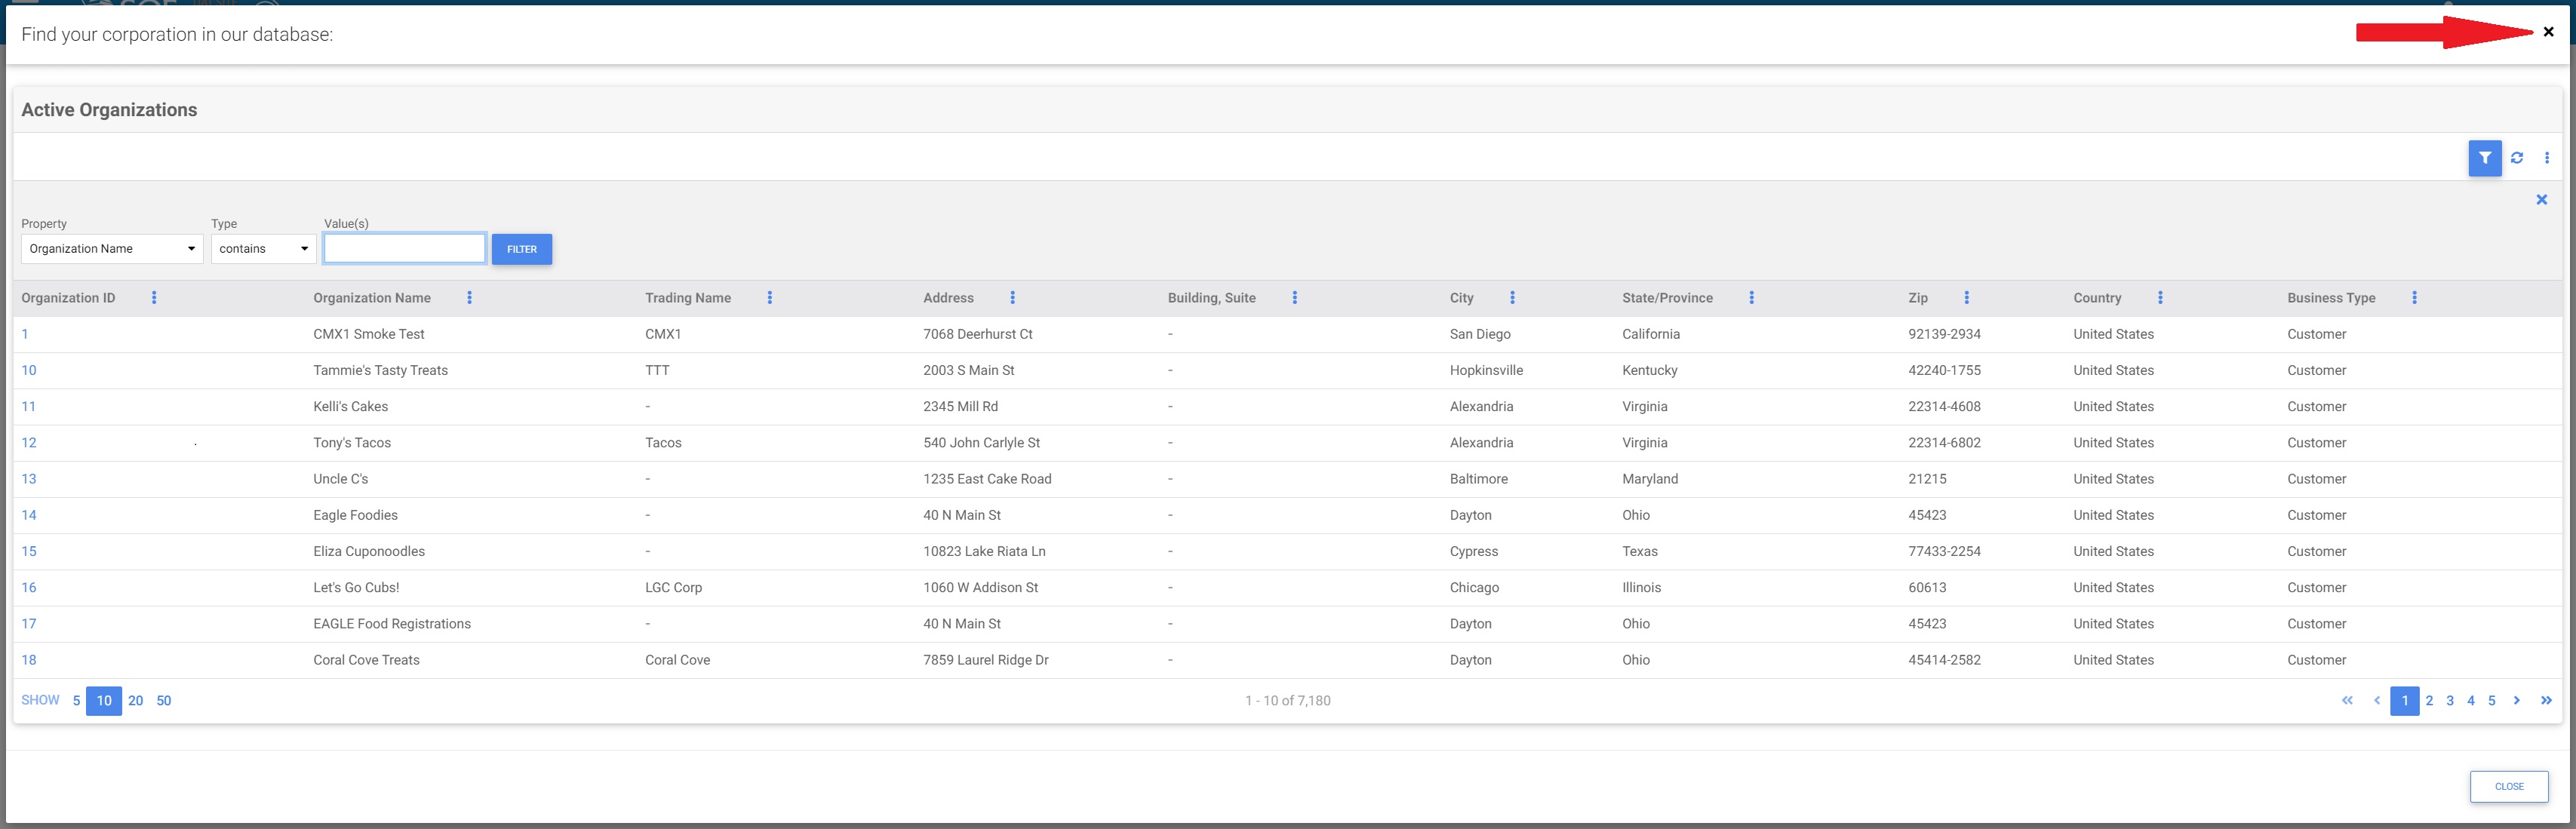
2. Click the blue “select” text to begin the process of searching for your corporate information.
3. Type your company name in the values field located at the top of the filtering and click the filter button next to the field. This will filter down your list of options.
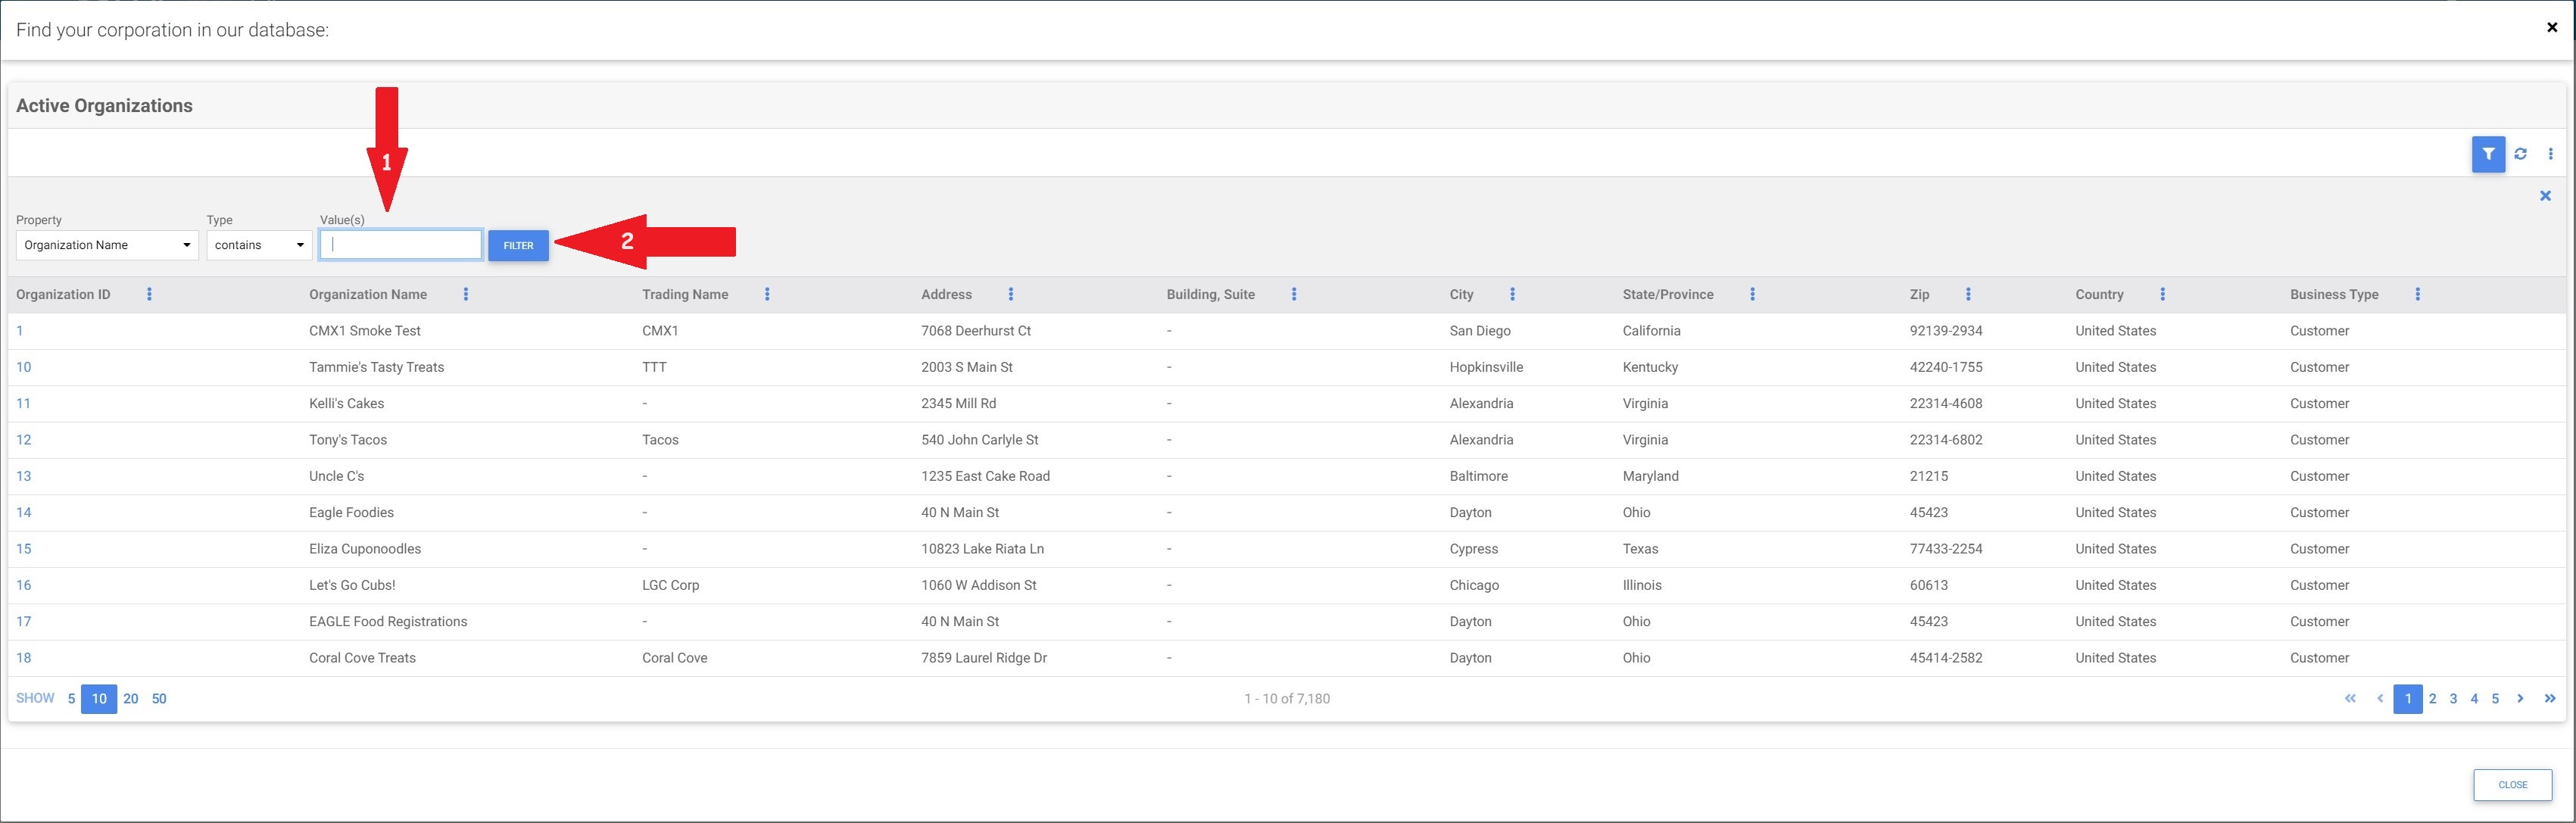
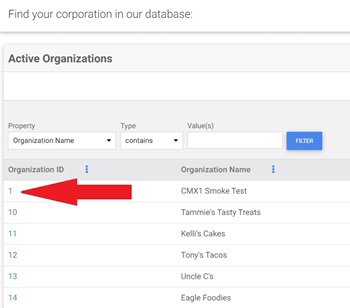
4. Click the Organization ID next to your corporate information.
5. If you cannot find your corporate information after filtering you will need to add it to our system. Close out of the filtering section by clicking the X in the upper right corner of the filtering screen.
6. When the window closes out you will be brought back to the Corporate Information screen. Click on the blue “I CANNOT FIND MY CORPORATION” link under the select option.
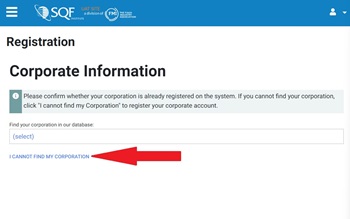
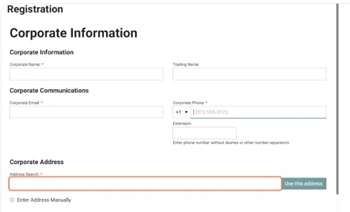
7. You will then be redirected to the page to enter your corporate information starting with the “Corporate Name”.

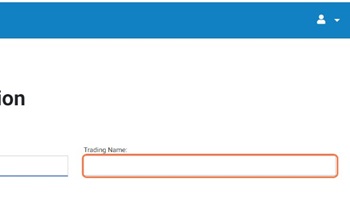
8. The “Trade Name” field is optional and is not required to be filled out for registration purposes.
9. Enter your corporations “Corporate Email”. Please do not enter your work email address, this needs to be a general corporate email.
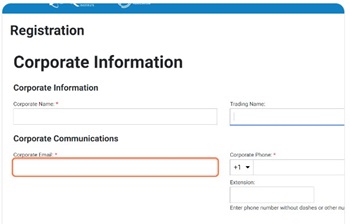
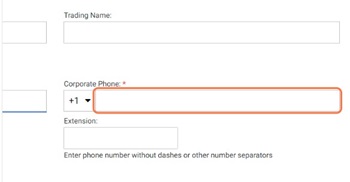
10. Enter your corporations “Corporate Phone Number”. Please do not enter your work phone number, this needs to be a general corporate phone number.
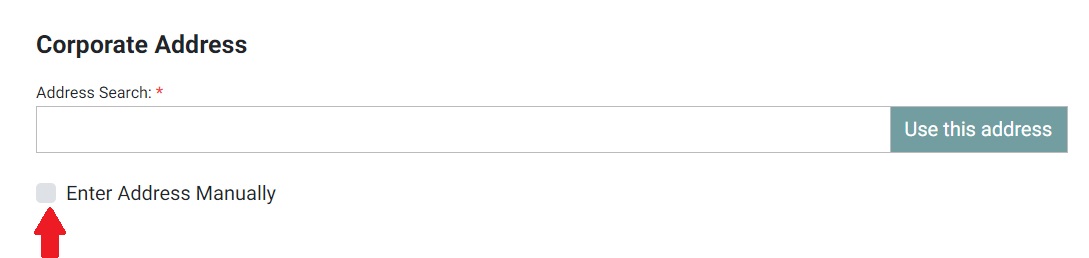
11. Enter your corporate address in the “Address Search” field where options will be suggested based on what you enter. You can choose to use the suggested address by clicking on one of the suggestions and then clicking the green “Use this address” button.
12. If your address is not found, you have the option to manually enter your corporate address information by clicking the check box next to “Enter Address Manually”.
13. Enter your corporate “Address”.
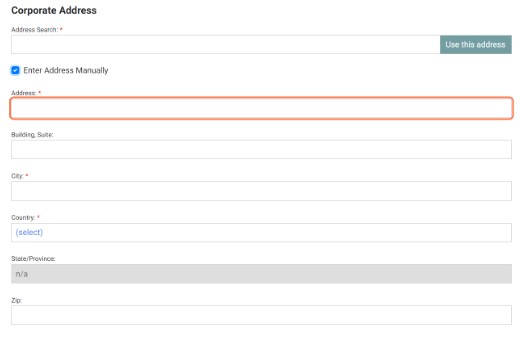
14. Enter your corporate “City”.
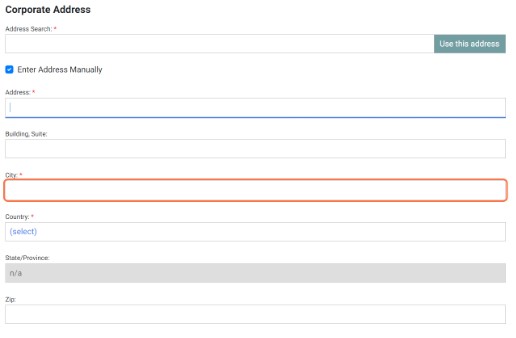
15. Enter your corporate “Country”.
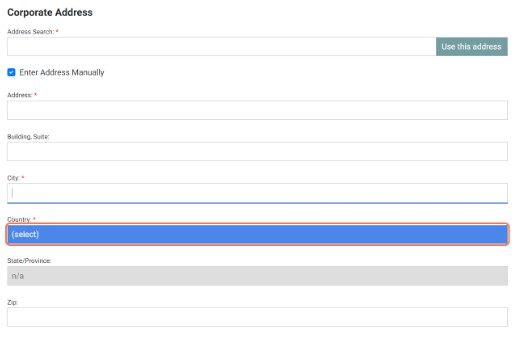
16. After you enter your corporate “Country”, the corporate “State/Province” and “Zip” will become mandatory and require you to fill in those fields.
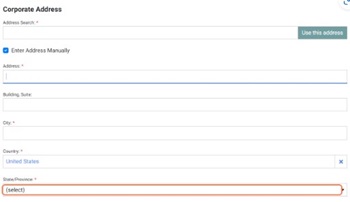
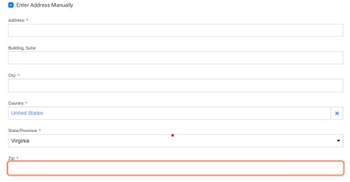
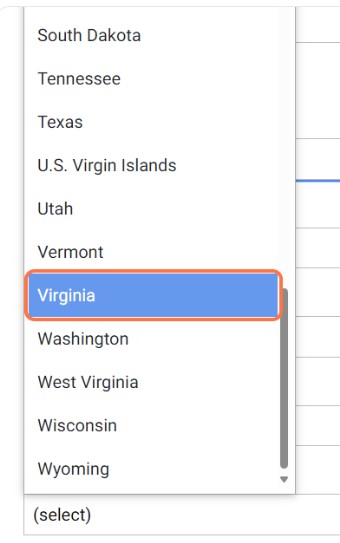
17. To select your corporate “State/Province” click on the “select” text. This will open a dropdown list where you will scroll through the list and click on your “State/Province” to select it.
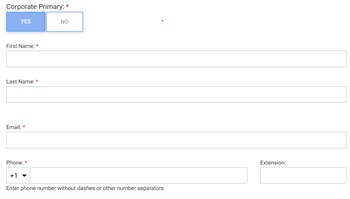
18. After you have completed entering your “Corporate Address” you will move down the screen to add your “Corporate Contacts” information.
Related articles
Privacy Policy |
Terms of Use
251 18th Street S., Suite 1200, Arlington, VA 22202 | Phone: (202) 220-0635
© 2025SQFI. All Rights Reserved.
Web Design & Development by Matrix Group International, Inc.